The operating rule for every dog daycare and boarding facility is this: remove organic matter first, wash with detergent and mechanical scrubbing, apply a proven disinfectant at label dilution and full contact time, then rinse and dry completely before any animal returns. Skipping or reversing any step breaks the chain. Disinfectant sprayed over feces or wet surfaces is largely wasted chemistry.
Here is your at-a-glance shift checklist to post at every cleaning station:
- Remove all solid waste and visible organic matter before touching a spray bottle
- Wash all contact surfaces with detergent and scrub mechanically (brush, foamer, or spray-and-vac)
- Rinse detergent residue thoroughly before applying disinfectant
- Apply disinfectant at the labeled dilution and hold the full contact time (typically 10 minutes)
- Rinse disinfectant if the label requires it; dry surfaces completely before dogs re-enter
- Spot-clean high-touch areas (gates, latches, water bowls) at every shift change
- Check and replenish PPE supplies (gloves, aprons) at each station
- Log completed tasks, solution mix date, and any animal health concerns in the shift record
The Merck Veterinary Manual defines this four-step sequence as the standard for shelter and commercial pet care sanitation. The King County pet business inspection checklist mirrors these expectations and adds requirements for written infection-control plans and documented schedules. Thedoggurus operational playbooks translate these standards into ready-to-use staff SOPs and training modules your team can follow from day one.
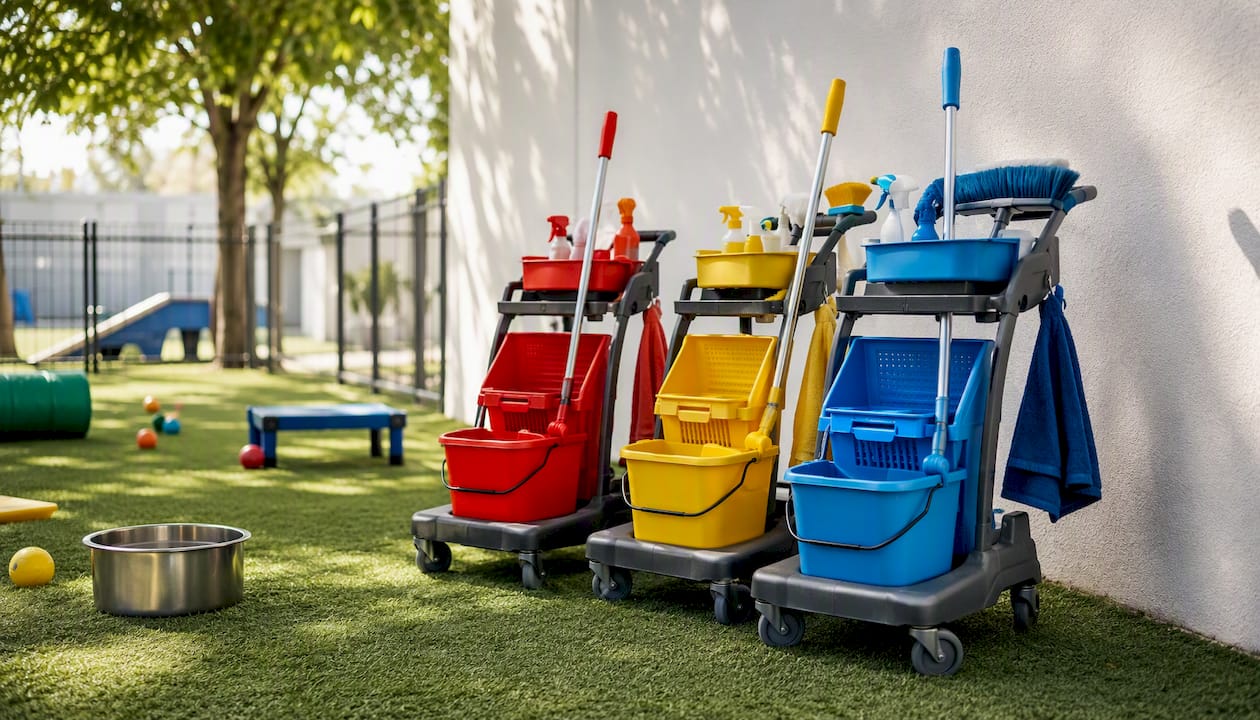
Pro Tip: Assign each cleaning zone its own color-coded cart and tools. Never move a mop, brush, or bucket from one zone to another mid-shift. This single control stops fomites from traveling between your highest-risk and lowest-risk areas without a single extra product purchase.
Key Takeaways
Effective dog daycare cleaning protocols require the correct four-step sequence, the right disinfectant matched to your target pathogen, zone-dedicated tools, and written records your staff follow and inspectors can verify.
| Point | Details |
|---|---|
| Four-step sequence is non-negotiable | Tidy, wash with detergent, disinfect at label dilution and contact time, dry before reoccupation. |
| Match disinfectant to pathogen | Bleach at 1:32 or AHP is required for parvovirus; standard quats may not be sufficient. |
| Zone-dedicated tools stop cross-contamination | Color-coded carts and mop heads assigned per zone prevent fomite transfer between areas. |
| Written records protect your license | Daily logs, mixed-solution labels, training records, and an infection-control plan are inspector requirements. |
| Thedoggurus provides ready-made SOPs | Staff training modules, competency checklists, and SOP templates are available through the platform’s staff products. |
Table of Contents
- What do cleaning protocols for dog daycare actually look like in practice?
- How do you choose and use disinfectants safely in a kennel?
- How should you handle bedding, toys, and bowls in a dog daycare?
- How do you prevent cross-contamination with cleaning tools and PPE?
- How do you manage waste and outdoor areas safely?
- What should your isolation SOP and outbreak response look like?
- Which facility design choices make cleaning faster and inspections easier?
- How do you train staff and keep the records inspectors expect?
- When do standard routines need to escalate?
- The cleaning mistakes that cost facilities the most
- Thedoggurus gives you the SOPs, training, and tools to make this stick
- Sources
What do cleaning protocols for dog daycare actually look like in practice?
Good cleaning protocols for dog daycare split into two operational states: shift-level (spot) cleaning while dogs are present, and between-occupancy deep cleaning after a group leaves or a kennel empties. Both follow the same four-step sequence, but the depth, time, and products differ.
Shift-level (spot) SOP
Use this during active daycare hours to maintain hygiene without disrupting play.
- Guide dogs away from the area being cleaned (into a cubby, adjacent run, or supervised play space).
- Remove all solid waste with a scoop; deposit into a sealed poop bucket, never into floor drains.
- Wipe or rinse visible soiling from surfaces with water before applying any product.
- Spot-wipe high-touch surfaces (gate latches, water bowl stations, door handles) with a detergent solution.
- Rinse, then apply disinfectant at the correct dilution; allow full contact time before dogs return.
- Wash hands thoroughly or change gloves before moving to the next zone.
- Log the task, time, and staff initials in the shift record.
Deep-clean (between-occupancy) SOP
Run this every time a kennel or run empties between occupants, and at end-of-day for all shared spaces.
- Remove all bedding, toys, and bowls; transport in a closed cart to the laundry/wash area.
- Scoop and bag all solid waste; seal and move to the dumpster.
- Pre-rinse the entire surface with water to loosen debris.
- Apply detergent and scrub mechanically top-to-bottom (walls, then floors) using a brush or foamer.
- Rinse completely until water runs clear.
- Apply disinfectant at the labeled dilution; maintain full wet contact time (minimum 10 minutes for most products against parvovirus).
- Rinse if the product label requires it; squeegee water toward floor drains.
- Allow surfaces to dry completely before restaging bedding or admitting a new dog.
Per Best Friends’ published dog cleaning protocol, only restage bedding if it is dry and visibly clean. Wet bedding restaged too early re-introduces moisture and microbial risk.
| Task | Spot/Shift | End of Day | Between-Occupant Deep Clean |
|---|---|---|---|
| Remove solid waste | Every incident | Every run | Every run |
| Detergent wash surfaces | High-touch spots | All surfaces | All surfaces, top-to-bottom |
| Apply disinfectant | High-touch spots | All surfaces | All surfaces at full dilution |
| Replace/launder bedding | If soiled or wet | If soiled or wet | Every time |
| Log completion | Per shift | Per shift | Per occupant change |
| Dry before reoccupation | Yes | Yes | Yes |
Spray-and-vac and foamer systems apply detergent more evenly than mop-and-bucket methods and reduce cross-contamination by eliminating the shared dirty-water problem. If you are still using a single mop bucket across multiple runs, that is the first equipment upgrade worth budgeting.
Pro Tip: Always clean the healthiest groups first, then move to higher-risk groups (puppies, senior dogs, dogs with known health concerns). Reversing that order pulls pathogens toward your most vulnerable animals.
How do you choose and use disinfectants safely in a kennel?
Choosing the right disinfectant is not about picking the strongest product. It is about matching the product to your target pathogen, using it at the correct dilution, and holding the full contact time on a pre-cleaned surface.
The four main product categories
- Sodium hypochlorite (bleach): Broad-spectrum, inexpensive, and effective against non-enveloped viruses including parvovirus. The Merck Veterinary Manual cites specific dilutions of bleach (1:32 and stronger for ringworm) with a 10-minute wet contact time. Bleach is corrosive to metals and irritating to airways, so ventilation is non-negotiable.
- Accelerated hydrogen peroxide (AHP): Effective against a wide range of pathogens including non-enveloped viruses, less corrosive than bleach, and generally safer for staff and surfaces. Contact times vary by product; always follow the label.
- Potassium peroxymonosulfate (e.g., Virkon S): Broad-spectrum, including parvovirus, and relatively safe on surfaces. Requires correct dilution and contact time; loses potency when the solution changes color.
- Quaternary ammonium compounds (quats): Common in kennel products and effective against many bacteria and enveloped viruses. Some quats do not reliably eliminate non-enveloped viruses like parvovirus at standard dilutions. If parvovirus is a concern, verify the product’s label claims against that specific pathogen before relying on it.
Dilution, contact time, and rotation
Every disinfectant works only at its labeled dilution and only when the surface stays wet for the full contact time. Diluting too much reduces efficacy; diluting too little can harm animals and surfaces. As an example, KennelSol lists different dilutions for routine daily use and for canine parvovirus, both requiring a 10-minute contact time, with higher concentration needed for parvovirus. That is a fourfold difference in concentration for the same product, depending on the pathogen you are targeting.
Rotating between product categories (for example, alternating bleach and AHP on a weekly schedule) reduces the risk of any single product failing against an emerging resistance pattern and helps you catch surface compatibility issues early.
The CFSPH/Maddie’s cleaning and disinfection protocol reinforces that drying after disinfection completes the process and prevents chemical exposure to animals re-entering the space.
Pro Tip: Print a laminated quick-reference card for each mixing station showing product name, dilution ratio, contact time, and expiry window. Staff should never have to guess or look it up on a phone mid-shift.
How should you handle bedding, toys, and bowls in a dog daycare?
Soft goods are the most overlooked vector in daycare hygiene. Porous items absorb pathogens and cannot be reliably disinfected once contaminated.
Laundry workflow
- Wash bedding and fabric items in hot water (at least 140°F) with a commercial laundry detergent; mechanical agitation is as important as temperature.
- Dry on high heat until completely dry; damp bedding re-introduced to kennels creates a moisture environment that supports microbial growth.
- Transport soiled laundry in closed, labeled carts to prevent cross-contamination with clean items or food prep areas.
- Never wash kennel laundry in the same machine used for human food-service items.
When to discard porous items
Remove and discard any bedding or fabric toy that is visibly soiled, wet, or has been in contact with a dog showing signs of illness. The King County inspection checklist recommends restricting or returning owner-provided porous items unwashed to reduce disease risk. A clear policy on owner-provided items (blankets, plush toys) protects you during inspections and reduces your cleaning burden.
Toys and bowls
Prefer non-porous toys (rubber, hard plastic) that can be washed with detergent and disinfected between uses. Plush toys should be discouraged in shared play areas; if a client insists, assign the toy to that dog only and quarantine it with the dog’s belongings. Bowls and dishes get washed with hot water and detergent after every use, then run through a commercial dishwasher or sanitized in a utility sink with a food-safe sanitizer. Never share bowls between dogs without washing in between.
Pro Tip: Create interchangeable “toy sets” per dog, stored in labeled bags. When staffing is tight, staff can grab the right set without sorting through a communal bin, and cross-use becomes nearly impossible.
How do you prevent cross-contamination with cleaning tools and PPE?
The tools you use to clean can spread pathogens just as effectively as a sick dog can. Controlling tool movement is one of the highest-leverage infection-control steps you can take.
Zone-dedicated tools
- Assign a color-coded cart, mop, brush, and squeegee to each zone (play area, kennels, isolation, outdoor).
- Store tools in their designated zone; never carry them across zone boundaries during a shift.
- Mops are particularly high-risk when shared: a single mop head can transfer pathogens from a contaminated run to a clean one in seconds. Replace mop heads after each deep-clean cycle, or use disposable mop heads.
- Clean and disinfect reusable tools (brushes, squeegees) at the end of every shift; allow them to dry before storage.
PPE requirements
- Gloves are mandatory for all cleaning tasks; change gloves between zones.
- Aprons or disposable coveralls protect clothing from splatter; remove and bag them before leaving a zone.
- Eye protection is required when using bleach, AHP, or any product with a splash risk.
- Handwashing stations with soap and paper towels must be accessible within the animal contact areas, not just in a back room. The ShelterVet sanitation guidance lists clear PPE and hand-hygiene procedures as a core component of any sanitation plan.
Staff flow
Clean healthier groups first, then move to higher-risk areas. During a deep-clean operation, restrict staff movement between zones until cleaning is complete and PPE has been changed. A staff member who walks from the isolation area into the main play space without changing gloves and washing hands is a fomite on two legs.
Pro Tip: Assign a “zone champion” per shift, one staff member responsible for a specific zone’s cleaning log and tool check. Accountability by name, not by team, is what keeps checklists from becoming suggestions.
How do you manage waste and outdoor areas safely?
Solid waste and drains
Remove feces from outdoor play areas immediately, not at the end of the shift. Fecal matter left on the ground concentrates parasites (Giardia, roundworm) and pathogens that survive in soil for weeks. Scoop into sealed bags, tie off, and deposit in a covered dumpster away from animal areas. Staff handling waste wear gloves and wash hands immediately after.
Floor drains in indoor areas need weekly flushing with a diluted disinfectant solution to prevent biofilm buildup. Never direct cleaning runoff into storm drains; check your local municipality’s requirements for wastewater disposal from commercial pet facilities, as regulations vary by county.
Outdoor surface realities
Gravel, grass, and dirt cannot be disinfected the way sealed concrete can. Your realistic options outdoors are:
- Remove waste immediately and consistently to reduce pathogen load
- Zone outdoor areas so a contaminated section can be closed and rested while another section stays in use
- Apply a diluted disinfectant to sealed concrete or rubber outdoor surfaces; accept that natural ground surfaces will not achieve the same kill rate
- Allow adequate dry time and UV exposure (sunlight is a natural virucide) between use cycles on natural surfaces
Pro Tip: Schedule outdoor cleaning at shift transitions, not during peak play times. Keep a contingency outdoor zone available so you can close a contaminated section without canceling outdoor play entirely.
What should your isolation SOP and outbreak response look like?
Every facility needs a designated isolation area before an outbreak happens, not after. The King County inspection checklist recommends sizing isolation capacity at approximately 10% of your total animal capacity, with sealed surfaces and separate ventilation where possible.
Immediate steps for a suspect infectious case
- Move the dog to the isolation area immediately; limit the number of staff who enter to one designated person.
- That staff member dons dedicated PPE (gloves, apron, eye protection) before entering and removes it before leaving.
- Cease all movement of staff between the isolation zone and general population areas without a full PPE change and handwash.
- Suspend group activities for any cohort that had direct contact with the suspect dog.
- Contact the dog’s owner and your facility veterinarian within the hour.
Escalation checklist
- Notify your veterinarian; if a zoonotic disease is suspected, contact your local public health department.
- Increase cleaning frequency in all exposed areas to between-occupancy deep-clean standard.
- Switch to a disinfectant with confirmed efficacy against non-enveloped viruses (bleach at 1:32 or AHP at label dilution).
- Cohort all animals that had contact with the suspect case; monitor for symptoms.
- Document every contact, cleaning action, and staff movement in your outbreak log.
- Consider temporary closure of affected areas until a full deep-clean cycle is verified complete.
- Conduct a post-incident review and update your written infection-control plan.
Pro Tip: Keep a pre-packed outbreak response kit in your isolation area: pre-measured disinfectant packets, extra PPE sets, a laminated escalation checklist, and a contact sheet with your vet’s number and local public health line. When a sick dog arrives, you want your staff reaching for a kit, not searching for supplies.
Which facility design choices make cleaning faster and inspections easier?
The right surfaces and layout reduce your daily cleaning labor and make inspections straightforward. Dog daycare design decisions made at build-out or renovation directly affect how long cleaning takes every single day.
Preferred surfaces and materials
- Floors and walls: Sealed, non-porous concrete or epoxy-coated floors; FRP (fiberglass-reinforced plastic) or sealed tile walls. Avoid unsealed wood, grout-heavy tile, or upholstered surfaces anywhere animals contact.
- Coved bases: Coved (curved) base junctions between floor and wall eliminate the right-angle corner where organic matter accumulates and where mops cannot reach.
- Rubber mats: Sealed rubber mats are acceptable; unsealed or cracked mats harbor bacteria and should be replaced.
- Bowls and fixtures: Stainless-steel or ceramic bowls only; avoid plastic bowls that scratch and harbor biofilm.
Drainage and layout
Floor drains in every play area and kennel run, sloped toward the drain, prevent standing water. Standing water after cleaning is a sign of a drainage problem, not a cleaning problem. Sinks for washing bowls and equipment must be separate from employee break-room sinks, a specific requirement on most state and county inspection checklists.
A dedicated isolation room with clear signage, a separate entrance if possible, and its own cleaning supplies is non-negotiable for any facility above a handful of dogs. Handwashing stations with soap and paper towels belong within arm’s reach of every animal contact point.
Pro Tip: Small retrofits pay outsized dividends: adding edge coving to existing floors and re-sealing worn grout takes a day and a modest materials budget, but it eliminates two of the most common inspection citations and cuts your daily scrubbing time noticeably.
How do you train staff and keep the records inspectors expect?
Training and recordkeeping are where most facilities fall short, not because owners don’t care, but because there is no system. The ShelterVet sanitation guidance suggests a working minimum near nine minutes per animal per day for routine sanitation labor, adjusted for facility specifics. That figure is a staffing planning tool: multiply it by your daily animal count and you have a baseline cleaning labor budget to work from.
Mandatory training topics for every staff member
- Correct cleaning sequence (tidy, wash, rinse, disinfect, dry)
- PPE selection, donning, doffing, and disposal
- Dilution math and how to use a mixing station
- Hand hygiene: when, how, and why
- Outbreak response and escalation steps
- Safe animal handling during cleaning operations
Time estimates for staffing calculations
| Task | Estimated Time |
|---|---|
| Spot clean per run (shift-level) | 3–5 minutes |
| Deep clean per run (between-occupant) | 10 minutes |
| Laundry cycle (wash + dry, per load) | 60 minutes |
| Outdoor waste removal (per session) | 5–10 minutes |
| Tool cleaning and storage (end of shift) | 10 minutes |
Required records
- Written infection-control plan (on-site, available to inspectors)
- Daily cleaning logs with staff initials, task, time, and solution details
- Mixed-solution labels on every spray bottle (product, dilution, date mixed, expiry)
- Staff training records with dates and competency sign-offs
- Incident and outbreak logs
For new hires, run a cleaning competency check in the first week and again at 90 days. Annual refreshers keep the standard from drifting. Staff training modules from Thedoggurus include ready-made competency checklists and photo-verified log templates that speed up audits considerably.
Pro Tip: Photo-verified logs, where staff photograph a completed clean before logging it, take 10 extra seconds per task and cut your audit prep time dramatically. They also change staff behavior: people clean more carefully when there is a record.
When do standard routines need to escalate?
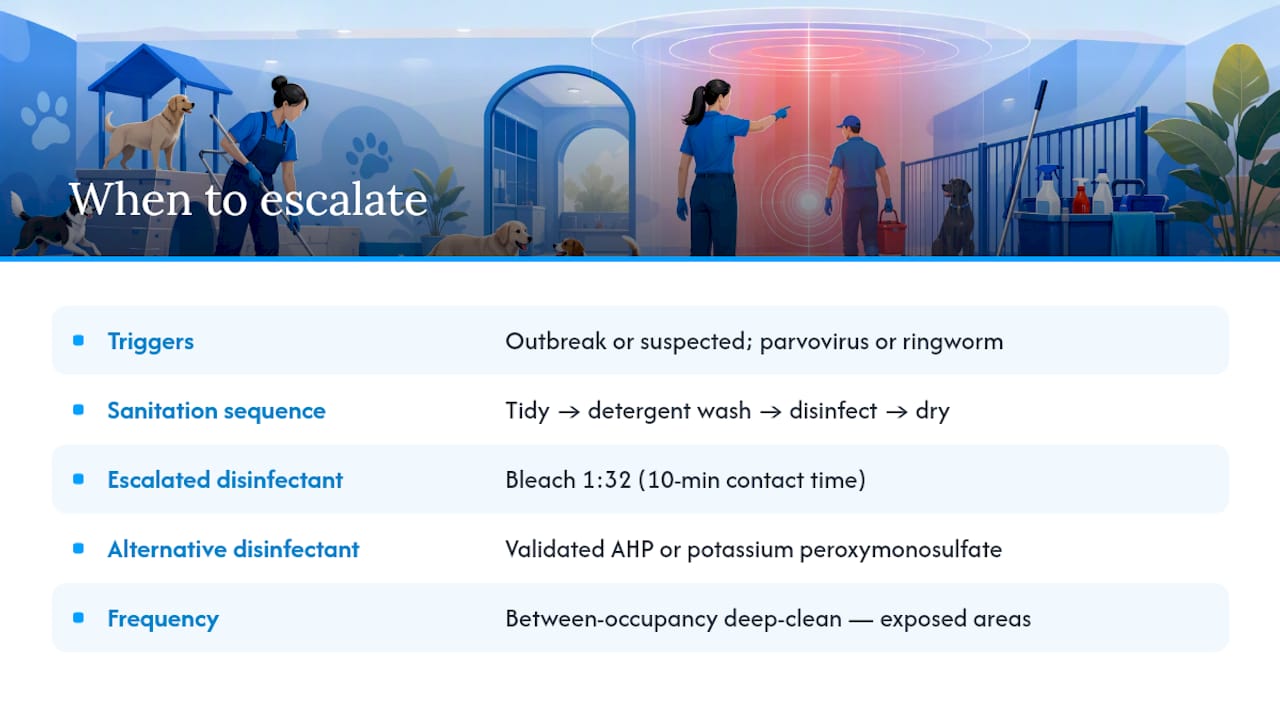
Standard cleaning protocols handle routine pathogen loads well. Two situations demand more: a confirmed or suspected outbreak of a hardy pathogen, and any case involving non-enveloped viruses like canine parvovirus or ringworm (dermatophytes).
The core evidence on sanitation sequencing is consistent across shelter-medicine authorities. The Merck Veterinary Manual, the CFSPH/Maddie’s protocol, and ShelterVet all converge on the same sequence: tidy, wash with detergent (mechanical action), disinfect at correct dilution and contact time, dry. Detergent washing alone removes the vast majority of bacteria and prepares surfaces for disinfection to work. Disinfectant applied without prior detergent washing is significantly less effective because organic matter neutralizes the active chemistry.
Key escalation principle from shelter medicine: When parvovirus or ringworm is suspected, standard quaternary ammonium products at routine dilutions are not sufficient. Switch to bleach at 1:32 dilution (10-minute contact time) or a validated AHP or potassium peroxymonosulfate product with confirmed label claims against non-enveloped viruses. Increase cleaning frequency to between-occupancy deep-clean standard for all exposed areas, not just the isolation room.
Source: Merck Veterinary Manual, Cleaning, Disinfection, and Sanitation in Shelter Medicine
Evidence-driven escalation checklist
- Confirm pathogen (or treat as worst-case non-enveloped virus until ruled out)
- Switch disinfectant to bleach 1:32, AHP, or potassium peroxymonosulfate with verified label claims
- Deep-clean all exposed areas before each new occupant, not just at end of day
- Discard or launder all porous items from exposed areas
- Increase hand hygiene frequency and PPE use across the entire facility
- Document every action with timestamps
Pro Tip: When you are in the middle of an outbreak and unsure which product to trust, call a veterinarian with shelter-medicine experience. They can confirm which disinfectants have validated efficacy for your specific pathogen and help you decide whether a temporary closure is warranted. Document that call in your outbreak log.
The cleaning mistakes that cost facilities the most
The most common failure in dog daycare sanitation is not ignorance of the correct sequence. Owners know they should clean before disinfecting. The failure is operational: a busy shift, a new staff member, and suddenly someone is spraying disinfectant over a soiled run because there is no time to scrub first.
The second most common failure is shared mop heads. A single contaminated mop head moved from a sick dog’s run to a healthy group’s play space can spread parvovirus across your entire facility in one cleaning cycle. Color-coded, zone-dedicated tools are not a luxury; they are the minimum standard.
Three fixes that deliver the most measurable improvement in the first 30 days include implementing scheduling best practices from Animal Booking’s dog groomers platform:
- Pre-measured dilution stations. Mount a labeled mixing station in each zone with pre-measured product dispensers. Staff mix correctly every time without doing math under pressure.
- Color-coded carts per zone. One cart, one zone, no exceptions. Post a laminated zone map at each cart so new staff cannot accidentally grab the wrong one.
- Weekly deep-clean slots on the schedule. Block time for between-occupancy deep cleans the same way you block time for play groups. Cleaning that is not scheduled does not happen consistently.
A 30-day action plan: Week 1, audit your current tool inventory and assign zones. Week 2, install dilution stations and laminated quick-reference cards. Week 3, run a staff competency check on the cleaning sequence. Week 4, conduct your first full facility deep-clean with the new system and log the results.
Thedoggurus gives you the SOPs, training, and tools to make this stick
Running a clean, inspection-ready facility is a team sport, and the hardest part is not knowing what to do. It is getting every staff member to do it correctly, every shift, without you standing over them.
Thedoggurus gives you the operational infrastructure to make that happen. The platform includes ready-made SOP templates, staff training modules covering cleaning sequence, PPE use, dilution math, and outbreak response, plus competency checklists your shift leads can run without your involvement. You get the dog daycare staff training products your team needs to stay consistent, and the recordkeeping tools that make your next inspection a non-event. Whether you are building your protocols from scratch or tightening up an existing system, the platform gives you a proven framework grounded in real pet care operations.
See which plan fits your facility at Thedoggurus pricing and get your team running the right protocols from day one.
Sources
- Cleaning, Disinfection, and Sanitation in Shelter Medicine – Special Subjects – Merck Veterinary Manual
- 5.3 Sanitation practices (Shelter medicine sanitation guidance)
- Pet Daycare/Kennel/Grooming Inspection Check List How to Prepare for Your Pre-Operational or Routine Inspection
- Cleaning and Disinfection Protocol
- Dog Cleaning Protocol (Best Friends)
- How to Clean Kennels: The Definitive Guide